|
Cobra pose is the greatest for preventing and relieving lower back pain and tension! Practicing with impeccable technique will allow you to get all of the goody out of it. Check out this video for tips: For more on the benefits of the Cobra, check out this post from way back! For more spine strengthening, come to any class on our schedule. ;)
0 Comments
I have been practicing Bikram yoga for 1.5 years. My beautiful wife Sophia has been doing it for years, and seeing the difference it makes in her life made me want to try it.
I have gotten numerous benefits from Bikram, starting with the common, increased strength, stamina, pain relief and flexibility. More surprisingly, I have developed a better sense of listening, contemplation and patience. With all the physical improvements, I am most proud of conquering my mind. Everything in my life has improved since I started Bikram yoga. Love, sex, relationships, work, even my tolerance of society. My skateboarding and surfing are more focused and I can target my aggression in productive ways. My Bikram yoga practice has helped me to improve my agility and recovery time, which has left me feeling like I have a long, long time to keep doing all the activities I enjoy. I think Bikram yoga is the key to longevity in all areas! The thought I have in the room that keeps me going is: solace. I want to thank Kay for this great honor of asking me to share my story, my wife for enhancing my life and the East Coast for making me strong. Love, Strength and Peace. -Wes Can you believe how much your thighs burn in this one? Or how hard it is to keep the straight leg from slipping? And then, the teacher seems to keep holding this posture forever! Good news: while Triangle is definitely challenging, it really doesn't have to be unbearable. Often, making one simple adjustment (such as the size of your step- see video above!) can completely change how much you love (or love to hate) a posture.
Triangle pose firms the thighs and waist, opens hips, and helps alleviate rheumatism, lumbago in the lower spine and frozen shoulder. Practicing this posture regularly helps correct chemical imbalances, relieves constipation, normalizes blood pressure and improves cardiovascular function. By exercising the circulatory, digestive, immune, reproductive, respiratory and muscular systems, Triangle pose targets and benefits every part of your body! (That's why it's often referred to as the "master posture" and... maybe that's why it feels like your teachers hold it forever.) Tips to remember:
Once your total foundation is in place, the next step is to move your both arms, making sure that the elbow is directly in front of the knee and the fingers are stretching down to touch between the big and second toe. Then turn your head and look up while stretching your arms in opposite directions. Simple, right? Ok, you got us: it's a tough one! Remember that all you have to do is try the right way. Do the best you can, breathe normally and hold absolutely still without moving. That's it. Enjoy..!! Want to learn more about the postures? Ask any of our certified Bikram yoga instructors, before or after your next Triangle pose. Attend class at least 2 to 3 times weekly to put your learning into action and make your body smile! Don't miss attending our Posture Clinic with Josh on Saturday, October 13! Free for BYSJ members, $20 everyone else.
As Bikram yoga teachers, so many students tell us this one is their "nemesis!" And we get it. SHTK not only requires you to use a ton of physical strength and stamina to develop your own flexibility, it also calls upon 110% of your will power, integrity and mental fortitude to stick with it, try the right way and not give up. The good news is, by using those aspects of your body and of your character you are building them up, and they (like this posture) will only get better with practice. Health benefits include:
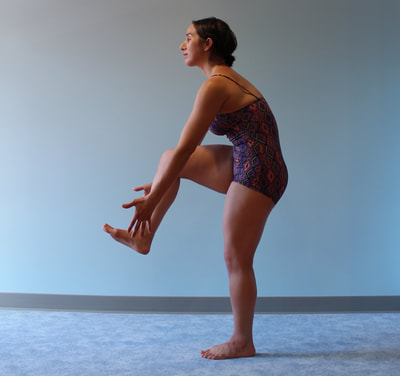
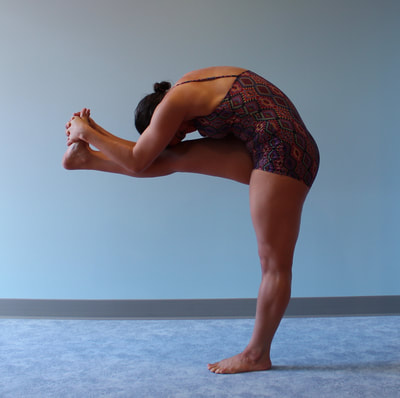
How to do: Standing Head to Knee can be best understood by dividing it into a progression of stages or steps. Keep in mind that while we identify 4 main "steps" in the posture, there are a bazillion mini-steps along the way, and any one of the steps may take you weeks, months or years to master. For example, between grabbing your foot and locking both knees, you may find your maximum expression of the posture somewhere in-between for quite some time. No worries: as long as you try the right way and you don't give up, that's the ultimate destination!
*You want me to lock my knee?? Yes. But let's make sure you understand what we mean by that. In Bikram yoga, to "lock the knee" means 3 things: Straight leg (full extension of the knee joint) + thigh muscles (including quads) contracted + body weight even on the foot. Check out our post on the subject for more! Eyes and abs!
Balancing on one foot is a big challenge for many beginners. Remember that your 2 best friends on your "balance team" are your abs and your eyes. So always keep your abdominal muscles pulled in firmly, and maintain your one point of focus on your standing knee throughout the posture. Breathe normally Breathing properly is key. If you’re working on Step 1, simply breath normally with an engaged core. If you are kicking out into Step 2, inhale slowly by the nose while you kick your leg forward. Take another deep inhale when your both knees are locked and exhale as you bend your elbows down for Step 3. Take another deep breath and slowly exhale again as you tuck your chin to your chest for Step 4. This focused breathing keeps you calm and maintains oxygen moving through your body to feed your muscles. It also assists with the stretching and rounding of your spine and ribs. Enjoy! Finally, the real secret to mastery of Standing Head to Knee is: attitude. Relish every step of the magical journey, because every step has something to offer your body, mind and soul. And more than anything, this posture demands that you activate and cultivate the connection between those! That's part of what makes it so tough, and that's also what makes it so... yoga. In the Bikram yoga system, we do the Awkward Pose in three parts. Here's a quick rundown of what to do in each one, how to do it, and why you should even care...
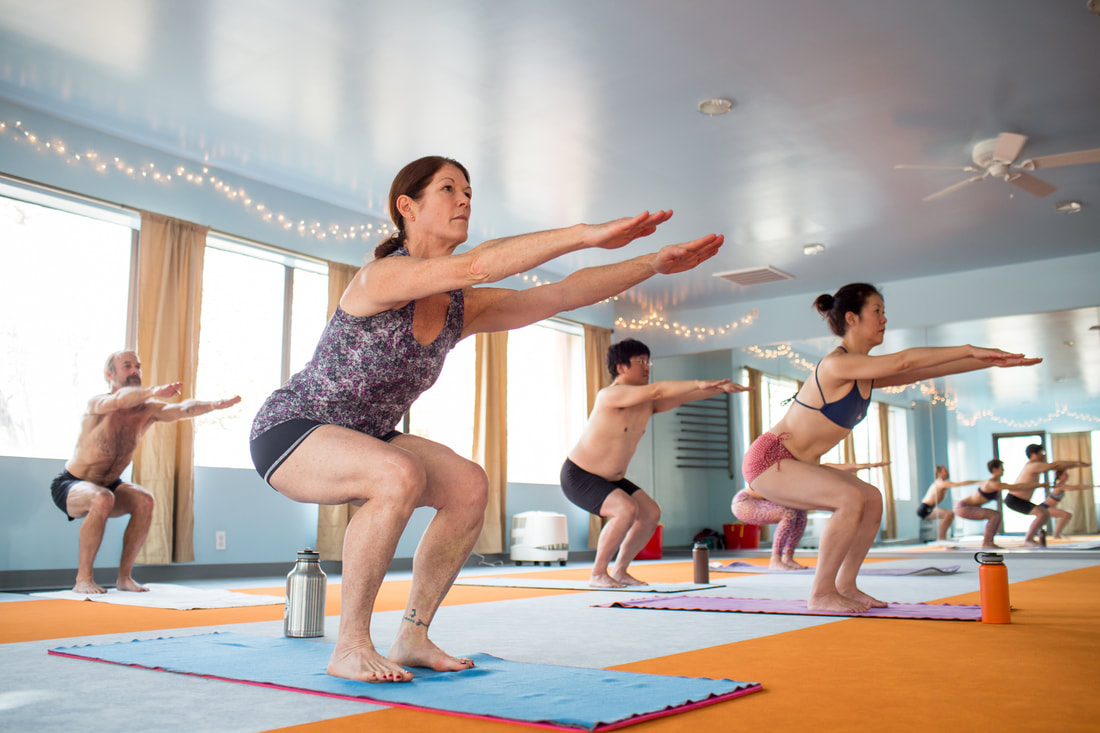
Even on its own, the first part of Awkward pose is an excellent all-around exercise, reminiscent of a squat you might have done at the gym (though Utkatasana has been keeping leg and butt muscles buff muuuuuch longer than the gym!) How to do Part 1: Step your right foot to the right about 6 inches, keeping your feet exactly parallel to one another so your heels stay invisible behind your toes. Keep in mind that in Bikram yoga "6 inches" varies from person to person! Basically, your heels should be directly underneath your hip joints. This alignment is important to make sure that when you sit down into the pose, pressure is distributed evenly in the hip, knee and ankle joints. Bring your arms up parallel to the floor with palms facing down and all 5 fingers together. Stretch your arms forward toward the mirror, exhale and suck your stomach in, then hold it in while you sit your hips back like you're sitting into a chair that's a bit too far behind you. Keep your spine straight to begin with and maximum body weight on your heels. It's normal if your upper body has to come forward a bit so you can sit your hips back. Once you're in the chair, lift your chest up and bend your total spine backward to bring your upper body back. (Tip: if you *can't* lift your chest up, you're probably sitting down too low- come up a little bit and try again.) Suck your stomach in and lean back into the heels even more, keep your chest up, lean back even more until you almost fall down backwards! Get psyched for Part 2: The second part of Awkward Pose is super challenging for a lot of people- so if your ankles are wobbling or your thighs are shaking, you are definitely not alone. The best tip for you is: don't skip it, and don't hold back from fear of falling or not being able to hold it the whole time. You have to start somewhere, and no one will laugh if you fall (most of us have been there!) Part 2 is great for increasing leg and foot strength as well as stretching out the feet, so give it all you've got and it will give you some nice-looking gams and great-feeling dogs in return! How to do Part 2: First stand up on your tippy toes and stretch your whole upper body up to the ceiling. Suck your stomach in and sit down as though you are sitting into a chair that's right underneath you. Be sure to sit down until your hips are in the chair, keeping your spine in a straight position. If you can only hold it that low for 2 seconds at first- be proud of your achievement! Little by little, you will build endurance- but only if you try the right way and you don't give up. How to do Part 3: By the 3rd part of Awkward pose, your legs are already well warmed up. Come up a little bit on your toes and bring your knees together, being sure to keep your heels behind your toes. Exhale breathing and sit down as slow as possible, keeping your knees together and your spine in a straight position. Sit down all the way onto your heels, then stretch your spine up towards the ceiling to make a half-inch gap between your hips and heels. Keep your knees together and forward, thighs parallel to the floor, arms parallel to the legs, spine straight so from the side you look like a 3-sided box. Here's the hard part: inhale breathing and slowly come up while keeping your spine straight. This requires you to really concentrate and connect with your lower abdominal muscles (to keep your hips from going back and upper body tipping forward) as well as tremendous thigh strength (and determination!) to keep your knees together. "But my knees!!" If you are suffering from knee pain, have a recent knee injury or have limited range of motion in your knees, here are a couple special tips for you in Awkward:
Why to get Awkward: All three parts of Utkatasana are excellent for improving blood circulation in the ankles, knees and hips. This pose strengthens the thighs, calves and hips muscles while improving flexibility of the hip, knee and ankle joints. Awkward helps relieve symptoms of rheumatism, arthritis and gout. It's also great for toning lower abdominal muscles, pelvic floor and the triceps muscles of the arms. Not to mention, it sure gets your heart rate up and is often the point in class where you'll really start sweating, making sure your limbs are nice and slippery for the next posture... 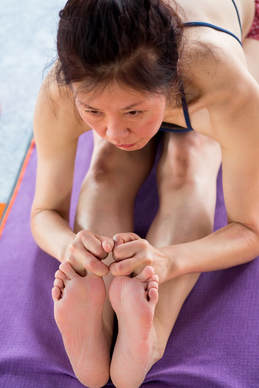 Q: What if my forehead will never touch my toes? A: Short answer: it doesn't matter. If you've been to my class (or if you've been reading this blog) you've probably heard me say/write something like "the goal is not the real goal." So while the "goal" of this posture as we say it in class is to touch your head to the feet- really the real goal is what happens along the way, the effect you create in your body simply by trying the right way. In this posture, the real goal is 360-degree-angle stretching, coccyx to toes, coccyx to head. Q: Why do we grab the big toes only? I'd rather grab my feet! A: Grabbing just the big toes ensures you create the 360-degree-angle stretching. Here's how it works: Because your only grip is on the toe, you are forced to use the fronts of your legs muscles (quadriceps and shins) to flex the feet and get the heels off the floor. Contracting the fronts of your legs means the backs of your legs can truly stretch from coccyx to the toes. When you pull the toes with your heels off the floor and stretch your body forward from the lower spine, you also stretch your spine from coccyx to the neck, creating 360-angle stretching. If you grabbed your feet from outside or the top (though it might seem more comfortable!) you wouldn't get that stretch to the lower back. As is so often the case (sigh) the uncomfortable way is the right way! So grab your big toes. ;) The best way to learn any posture and experience for yourself the benefits it has to offer is to come to class on the regular (3-5 times a week is best) and make your body smile. Got other questions? Ask one of our certified instructors next time you are in for class- or drop us a line in the comments below! 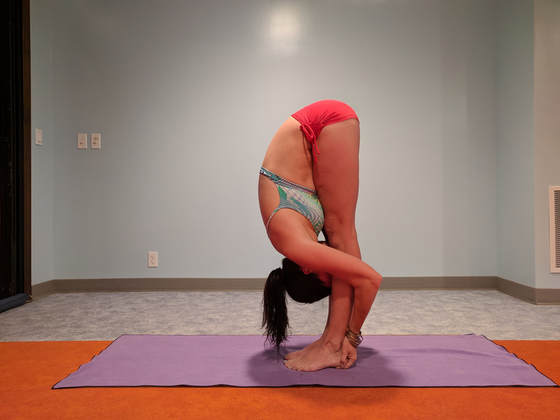 "About seven years ago my friend told me what a deep and awesome yoga series Bikram Yoga was for her; I had heard about Bikram before, but seeing her enthusiasm really sparked my interest. When I finally made the decision to go, I really went because I wanted to heal my spine from a car accident and in general I wanted to develop a more healthy lifestyle. I hoped to lose body fat, and build muscle and bone strength. I wanted to quit smoking. I knew that if anything would help any combination of these things, it would be reintroducing a yoga practice into my life. I had practiced Ashtanga yoga, years prior to trying Bikram and my car accident, and I was looking to try something new. My regular practice has helped me achieve all of these goals! I once suffered from three bulging discs in my lumbar spine. My bulging disks often became inflamed in other exercises she tried, and through the warmth of the heat and the progressive backward bending and aligning postures of the Bikram yoga series, I no longer have any bulging discs or discomfort in my back. "I lost close to 30 lbs that I took on after my car accident and struggled to lose before. I began to have strength and definition in parts of my body that had previously felt static. I also quit smoking. My regular practice has helped me achieve all of the goals I started with, but has moreso helped me realize that by making it an integral part of my life it helps me in many more ways! "My yoga practice has become my catalyst to overcome whatever it is that I need to work out, literally or figuratively, each day. It's amazing how the same series of 26 postures and 2 breathing exercises remains consistent, but my experience changes daily based on the external energy I bring in from outside of the hot room. "Besides the obvious physical benefits, I've also been most grateful for the spiritual, mental, and emotional growth that has come by integrating my Bikram yoga practice into my life. By embracing the uncomfortable obstacles I encounter in the hot room (the heat, my stiffness, distractions, the sweat!) I find I have great strength to take on challenges I meet outside of the hot room. Simply put: practicing this series makes me a better human! "The thing that continues to amaze me most is the reassurance I gain from the practice that BIG things are possible: that if you apply action, with patience and intention, and the willingness to fail, and try again, that anything is possible. "I am preparing to go to Bikram's Teacher Training this fall, and I am so excited! By becoming a Bikram Yoga teacher I will be able to inspire and help others heal themselves through this yoga. I want to study and know in depth the science and meaning behind every bit of the dialogue. I want to deepen my personal practice. I want to dedicate myself to Bikram yoga for life. It has improved my life so much for the better and it's time to share it with others!" |
AuthorHHY Founder, Yoga Business Coach, yoga-doer and life-lover, Kay Afif! Categories
All
|

 RSS Feed
