|
As Bikram yoga teachers, so many students tell us this one is their "nemesis!" And we get it. SHTK not only requires you to use a ton of physical strength and stamina to develop your own flexibility, it also calls upon 110% of your will power, integrity and mental fortitude to stick with it, try the right way and not give up. The good news is, by using those aspects of your body and of your character you are building them up, and they (like this posture) will only get better with practice. Health benefits include:
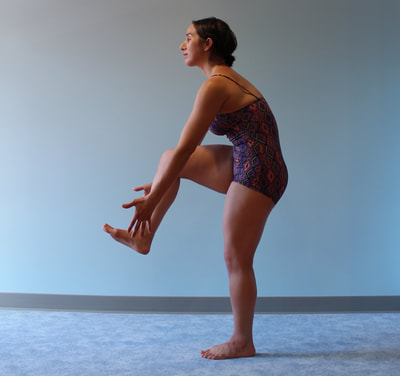
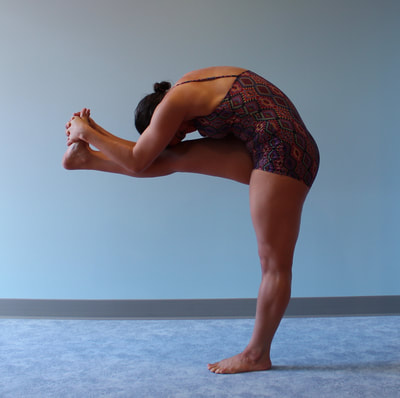
How to do: Standing Head to Knee can be best understood by dividing it into a progression of stages or steps. Keep in mind that while we identify 4 main "steps" in the posture, there are a bazillion mini-steps along the way, and any one of the steps may take you weeks, months or years to master. For example, between grabbing your foot and locking both knees, you may find your maximum expression of the posture somewhere in-between for quite some time. No worries: as long as you try the right way and you don't give up, that's the ultimate destination!
*You want me to lock my knee?? Yes. But let's make sure you understand what we mean by that. In Bikram yoga, to "lock the knee" means 3 things: Straight leg (full extension of the knee joint) + thigh muscles (including quads) contracted + body weight even on the foot. Check out our post on the subject for more! Eyes and abs!
Balancing on one foot is a big challenge for many beginners. Remember that your 2 best friends on your "balance team" are your abs and your eyes. So always keep your abdominal muscles pulled in firmly, and maintain your one point of focus on your standing knee throughout the posture. Breathe normally Breathing properly is key. If you’re working on Step 1, simply breath normally with an engaged core. If you are kicking out into Step 2, inhale slowly by the nose while you kick your leg forward. Take another deep inhale when your both knees are locked and exhale as you bend your elbows down for Step 3. Take another deep breath and slowly exhale again as you tuck your chin to your chest for Step 4. This focused breathing keeps you calm and maintains oxygen moving through your body to feed your muscles. It also assists with the stretching and rounding of your spine and ribs. Enjoy! Finally, the real secret to mastery of Standing Head to Knee is: attitude. Relish every step of the magical journey, because every step has something to offer your body, mind and soul. And more than anything, this posture demands that you activate and cultivate the connection between those! That's part of what makes it so tough, and that's also what makes it so... yoga.
0 Comments
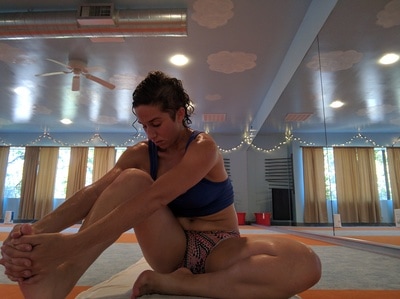
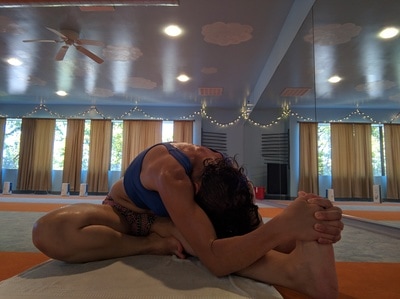
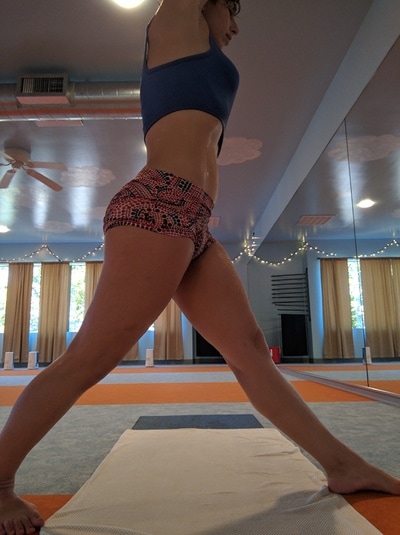
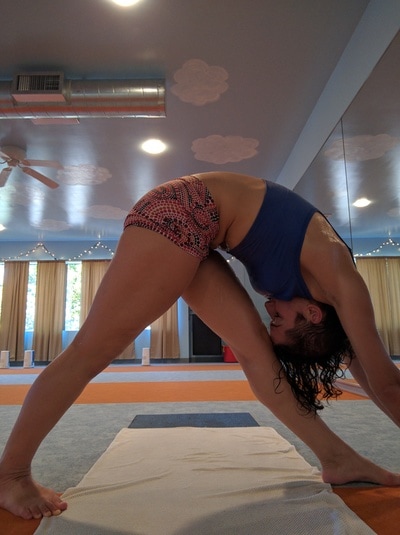
These photos were taken on Independence Day. First (the ones where my forehead is nowhere near my knee!) are what my Head to Knee and Standing Separate Leg Head to Knee poses looked like about 1 year ago, when my lower back was in continuous muscle spasm from lifting my baby the wrong way one too many times. The second photos in each pair are what my postures look like now- and also what they looked like just 5 days after my back injury.
I remember the date because I had to miss my good friends' wedding- I could not bear the pain of sitting in the car to get there. I could not pick up my daughter to hold her if she cried. For several days, I lost my independence. I could not cook my food, do my laundry, pick up a bag, open a door, or even stand for over a minute without severe pain. What could I do? I could come to yoga. And I did. I came to yoga every day for 5 days. I did very very gentle stretching. In many postures this meant I could only do the very first step or two in setting up the posture. I did not do any sit-ups. Even in the backward bending postures- and I think this part gets overlooked sometimes- I did not "kill myself," as is normally encouraged when practicing with a spine that's feeling a-ok. I got myself to the place where I could tolerate the pain, and I held it and worked my breath. My Cobra pose for example, where the instructions are to get the upper body off the floor until only the belly button is touching? I got my chin off the floor a little. Yeah. And that was my posture. It hurt! But I could breathe. And when I let it go, I felt a wash of relaxation across my back, like my back was exhaling. I wanted to share these images with you because I hope they will drive home the point our teachers are always making in class: when you're in pain you need to do less of a posture, you need to take it easy, sometimes you even need to skip a posture- and all of that is perfect. Especially for those of us who started this yoga without a specific physical limitation or pain, it can be difficult to translate what "doing less" means when we find ourselves practicing with an injury. These photos (the first in each pair) are an example of what it looks like to "do less." Notice that I didn't change a thing about the form or technique of the pose- I simply started slow and did step 1, then (maybe) step 2, etc, and stopped as soon as I needed to in the sequence. I did not concern myself with how my posture looked or felt before my injury, I just focused on what I could do right then. Since I've practiced through injury before, I knew this was the way. This yoga is meant for healing as well as for prevention of injury- depending on our goal, we need to practice in an appropriate way. I always see injuries as a gift and an opportunity to learn. Because practicing to heal injury means honing the invaluable skill of understanding and attending to my body's signals. Too much pain? Back off. Feels all right? Go for it, little by little. Too exhausted to go on? Lie down as long as you need to and enjoy the benefits of the hot, humid room. This skill can only serve me and it will never ever hurt me. If you are hurting, there is only one thing you must do to start healing: come to class! Bikram yoga works amazingly for not only chronic conditions but acute injuries as well. Do not stay home and wait until you feel better- coming to yoga will help you feel better. Using Bikram yoga for healing means coming more often and doing less. For me, one of the hardest parts of being in debilitating pain was the loss of independence. I needed others to help me do things I wanted to do for myself. So I took the one thing I could do and the one thing I knew I had to do, and I changed everything around. That's my story, but it isn't unique. It is no more than cause and effect, action and reaction. The results can be replicated by you. If you simply commit to caring for yourself during injury by practicing in a therapeutic way, Bikram yoga is sure to help you restore the independence of pain-free (or at the very least, pain-reduced!) living. And that is something worth celebrating! |
AuthorHHY Founder, Yoga Business Coach, yoga-doer and life-lover, Kay Afif! Categories
All
|

 RSS Feed
