
|
Can you believe how much your thighs burn in this one? Or how hard it is to keep the straight leg from slipping? And then, the teacher seems to keep holding this posture forever! Good news: while Triangle is definitely challenging, it really doesn't have to be unbearable. Often, making one simple adjustment (such as the size of your step- see video above!) can completely change how much you love (or love to hate) a posture.
Triangle pose firms the thighs and waist, opens hips, and helps alleviate rheumatism, lumbago in the lower spine and frozen shoulder. Practicing this posture regularly helps correct chemical imbalances, relieves constipation, normalizes blood pressure and improves cardiovascular function. By exercising the circulatory, digestive, immune, reproductive, respiratory and muscular systems, Triangle pose targets and benefits every part of your body! (That's why it's often referred to as the "master posture" and... maybe that's why it feels like your teachers hold it forever.) Tips to remember:
Once your total foundation is in place, the next step is to move your both arms, making sure that the elbow is directly in front of the knee and the fingers are stretching down to touch between the big and second toe. Then turn your head and look up while stretching your arms in opposite directions. Simple, right? Ok, you got us: it's a tough one! Remember that all you have to do is try the right way. Do the best you can, breathe normally and hold absolutely still without moving. That's it. Enjoy..!! Want to learn more about the postures? Ask any of our certified Bikram yoga instructors, before or after your next Triangle pose. Attend class at least 2 to 3 times weekly to put your learning into action and make your body smile!
0 Comments
Don't miss attending our Posture Clinic with Josh on Saturday, October 13! Free for BYSJ members, $20 everyone else.
As Bikram yoga teachers, so many students tell us this one is their "nemesis!" And we get it. SHTK not only requires you to use a ton of physical strength and stamina to develop your own flexibility, it also calls upon 110% of your will power, integrity and mental fortitude to stick with it, try the right way and not give up. The good news is, by using those aspects of your body and of your character you are building them up, and they (like this posture) will only get better with practice. Health benefits include:
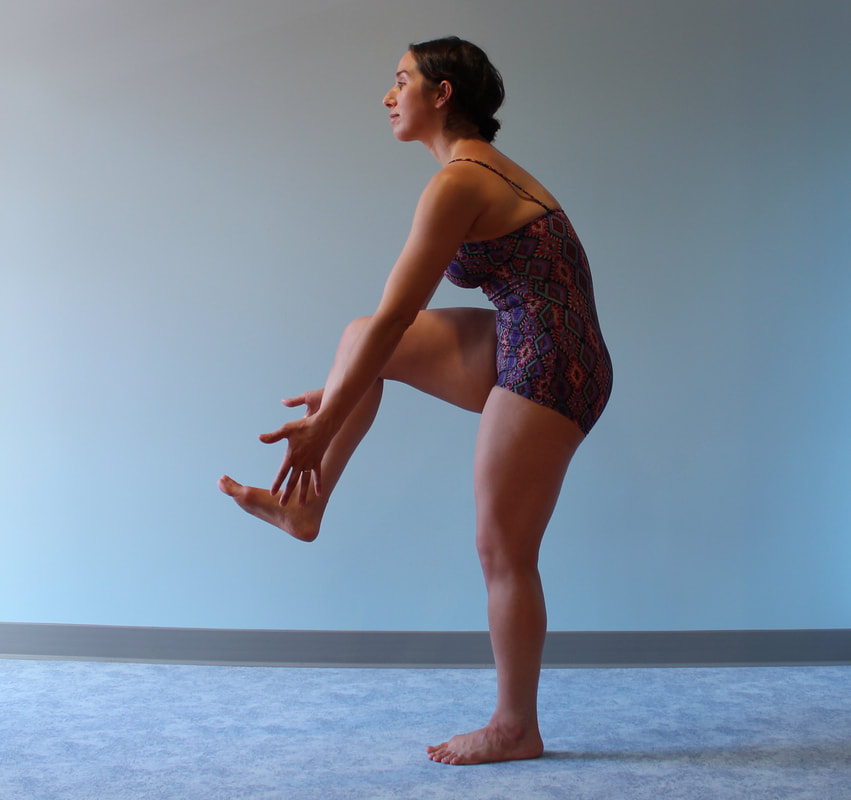
How to do: Standing Head to Knee can be best understood by dividing it into a progression of stages or steps. Keep in mind that while we identify 4 main "steps" in the posture, there are a bazillion mini-steps along the way, and any one of the steps may take you weeks, months or years to master. For example, between grabbing your foot and locking both knees, you may find your maximum expression of the posture somewhere in-between for quite some time. No worries: as long as you try the right way and you don't give up, that's the ultimate destination!
*You want me to lock my knee?? Yes. But let's make sure you understand what we mean by that. In Bikram yoga, to "lock the knee" means 3 things: Straight leg (full extension of the knee joint) + thigh muscles (including quads) contracted + body weight even on the foot. Check out our post on the subject for more! Eyes and abs!
Balancing on one foot is a big challenge for many beginners. Remember that your 2 best friends on your "balance team" are your abs and your eyes. So always keep your abdominal muscles pulled in firmly, and maintain your one point of focus on your standing knee throughout the posture. Breathe normally Breathing properly is key. If you’re working on Step 1, simply breath normally with an engaged core. If you are kicking out into Step 2, inhale slowly by the nose while you kick your leg forward. Take another deep inhale when your both knees are locked and exhale as you bend your elbows down for Step 3. Take another deep breath and slowly exhale again as you tuck your chin to your chest for Step 4. This focused breathing keeps you calm and maintains oxygen moving through your body to feed your muscles. It also assists with the stretching and rounding of your spine and ribs. Enjoy! Finally, the real secret to mastery of Standing Head to Knee is: attitude. Relish every step of the magical journey, because every step has something to offer your body, mind and soul. And more than anything, this posture demands that you activate and cultivate the connection between those! That's part of what makes it so tough, and that's also what makes it so... yoga. Hearing Voices: Turn Off the Mind By Tuning in to Bikram Yoga (Special guest blog post by Ellen!)7/15/2018  “Didn’t you just eat too many cucumbers? You might get sick.” That’s what the voice in my head said as I was preparing to attend a recent class. The voice in my head is constantly trying to come up with reasons I should not attend Bikram Yoga class. It tells me I’m too busy, too tired, too stiff, or just plain not good enough to do yoga. Ironically, some of the reasons it gives me for not setting foot in the hot room are exactly the reasons I need to be in there as often as possible. Most days, pushing that voice away is the most important exercise I do, and it’s the one that requires the most strength. Yoga is slowly teaching me to ignore the voice in my head, and it is also teaching me how to listen.
Ideally, from the start of Pranayama Deep Breathing all the way through Kapalbhati in Vajrasana your body should be moving in perfect concert with the instructor’s voice. The instructions describe exactly how to perform each posture, down to the way you should breathe. I find that when I am able to connect perfectly with the teacher’s words my practice is very meditative. It doesn’t happen in every class, but those times are like magic. When I start confusing my right from my left hand in Eagle pose, or wishing I could stand on one leg as easily as some other student, I know that I am not aligned with the instructor. I know that I am not listening. In order to listen I have to tune out the voice in my head. I have to tune out the voice in my head because it interprets events through a lens of emotion. In his book, How Yoga Works, Geshe Michael Roach describes the mind this way: “We lose control of ourselves, even if we have some understanding, and the last thing we can do at that moment of emotion is to recall that it is actually our own minds making us see things the way we do.” (p. 124) And so, the real yoga is not found in Standing Head to Knee Pose or Fixed Firm Pose, or any of the poses. The real yoga is turning off your mind and listening within. Now, I wonder if there are any cucumbers left...? Ellen Cole is a Registered Nurse and has been practicing Bikram yoga at BYSJ since August of 2016. One of her favorite poses is Fixed Firm Pose and she loves doing "doubles" when she gets the chance. Read more of Ellen's yoga story here. Thanks for your contribution, Ellen! Once all major joints of the body have been warmed up by practicing Pranayama breathing and the first few postures, you are ready for Eagle pose, garudasana! This pose opens up the joints of the ankles, knees, hips, shoulders, elbows and wrists. By twisting your limbs "like ropes" Eagle pose creates compression of blood and lymph flow headed to spots like your legs, kidneys and the lymph nodes in your armpits. Hold the posture very still while breathing calmly, so that when you release it your elevated heart rate will send a boost of high-speed circulation to those areas. Notice a white mark on your thigh after you come out of Eagle? That's a good indicator that you’ve been maintaining a strong compression. What's that you say? Your arms won't twist like ropes? Here's a quick video on what to do for this (very common) "issue"... Now that we've cleared up what to do with those pesky arms, here are a couple key aspects of Eagle pose and more tips to help you get the most out of your efforts:
Using leverage to promote good alignment and open joints. When you move your knees to the right and upper body to the left to get your feet, knees, elbows and hands in one line, you are using the leverage of one limb against to create the compression effect I mentioned above and open up your major joints. The key to not falling over while you make these adjustment is keeping your (especially lower) abdominal muscles tight and your upper body lifted away from your thighs. It's a backbending pose! Many beginners tend to lean or even hunch their bodies forward while they're setting up their Eagle, in an effort to pull their elbows down. Don't let this happen to you! Keep your upper body (when you hear the cue "upper body" in class, think mainly lower ribs upward) leaning back throughout the posture, which means (although you'll end up looking straight ahead) your spine is actually in a backward bending position. This position strengthens back and core muscles, releases tension in your lumbar spine, and compresses the kidneys. Pro Tips:
Want to deepen your understanding and get more goody out of your Bikram yoga practice? Check out these posts below for more videos from Kay, or search the archives for "tips!"
Want to deepen your understanding and get more goody out of your Bikram yoga practice? Check out these posts below for more videos from Kay, or search the archives for "tips!"
For tips (and videos!) on other beloved Bikram yoga postures, check out the following posts! Or simply search the archives for "Posture of the Month."
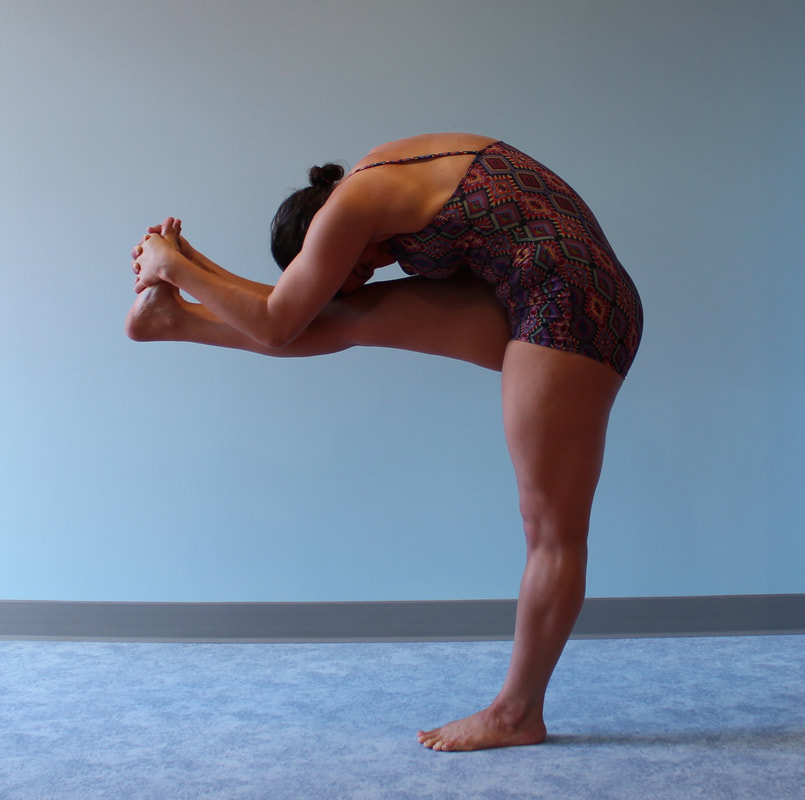
As the first posture in the Bikram yoga class, the job of Half Moon pose (ardha chandrasana) is to get your spine feeling out its range of motion in a bunch of directions, right off the bat. By stretching up out of your waist, then slowly bending your upper body to the right while pushing your hips to the left beyond your perceived flexibility, you will create an incredible stretch down the side of your body. This side-bending action either stretches or tones every muscle in the torso, increases the lateral flexibility of the spine, opens up the hips and trims the waistline. Oh, what a feeling- and then you get to do it to the left! 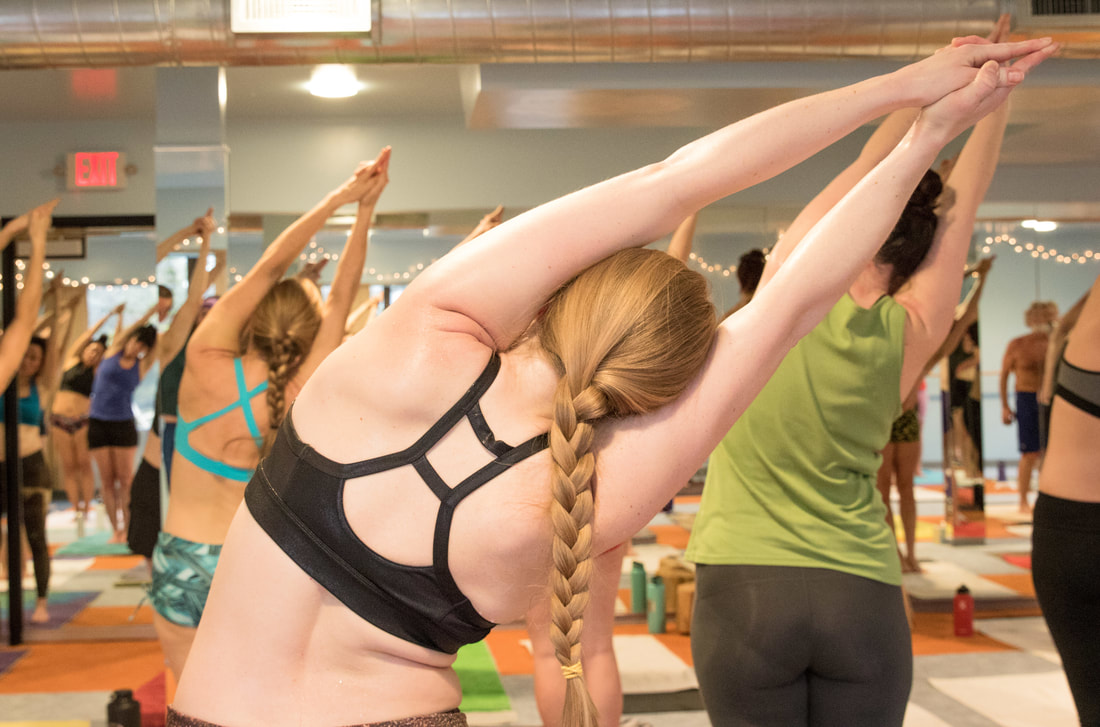 TIP: Half moon is the very first posture in the class, so there's no need to push it super hard, especially in the first set! Your body is not quite warmed up yet, so "take it easy, honey." Remember that the first set of every pose is diagnostic- it helps you figure out where your body is in the present moment. Second set is therapeutic- based on what you discovered in the first set, you decide whether to push a bit further, or back off a little more. Your breathing is an excellent indicator of which way to adjust- if you really can't keep your breathing normal (like you're watching TV) then you've done too much! Back off.) Once we have stretched to both sides, the third part of Half Moon is backward-bending. Your instructor will warn you, "Your back is going to hurt, don't be scared!" PSA: That doesn't mean that if a part of your body screams in sharp pain, that we think you should push through it! Not at all. This statement is simply a "heads up" that it's normal for the backbend to be uncomfortable- or even "hurt," in the sense of "ouch, I don't usually use those muscles!" Backbending can be a pretty uncomfortable position at first. It requires you to simultaneously use a lot of strength in your legs, hips and back while also relaxing the neck and stretching the arms and shoulders back as far as you can. The challenge (and any "hurt") is worth it though, because this first backbend is unbeatable at warming up the back muscles and de-stiffening (that's a technical term!) your spine for class, while opening the heart and chest. Be sure to keep your eyes open, so you don't get dizzy. At this point you have moved your spine straight up, side to side, and backward. Next comes Hands to Feet pose (padha hastasana.) This forward-folding posture continues to stretch the spine while beginning to work on stretching the sciatic nerve, muscles, tendons and ligaments of the legs. TIP: If you can't grab your heels from behind, bend your knees and try wrapping your elbows behind your calves. Then hold the backs of your ankles and start to straighten out the legs, keeping your grip by keeping pressure with the palms against the ankles. Eventually, you may be able to grab underneath your heels- for now just get as close as you can! 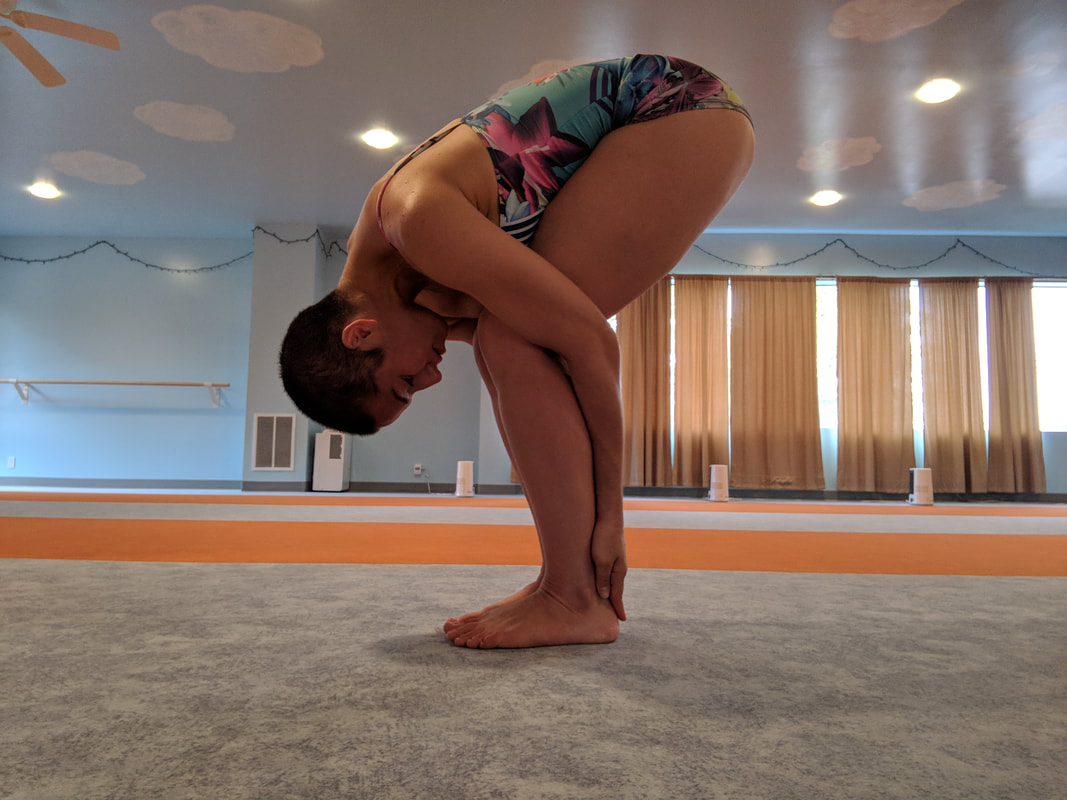 Besides the tremendous stretching, Padha hastasana also helps improve overall circulation to the legs, sends a nice rush of blood to the head, and strengthens biceps, lattisumus dorsi, quadriceps, hands and fingers. Always remember to keep your breath moving calmly, in and out of your nose- a smiling happy face can help. :)
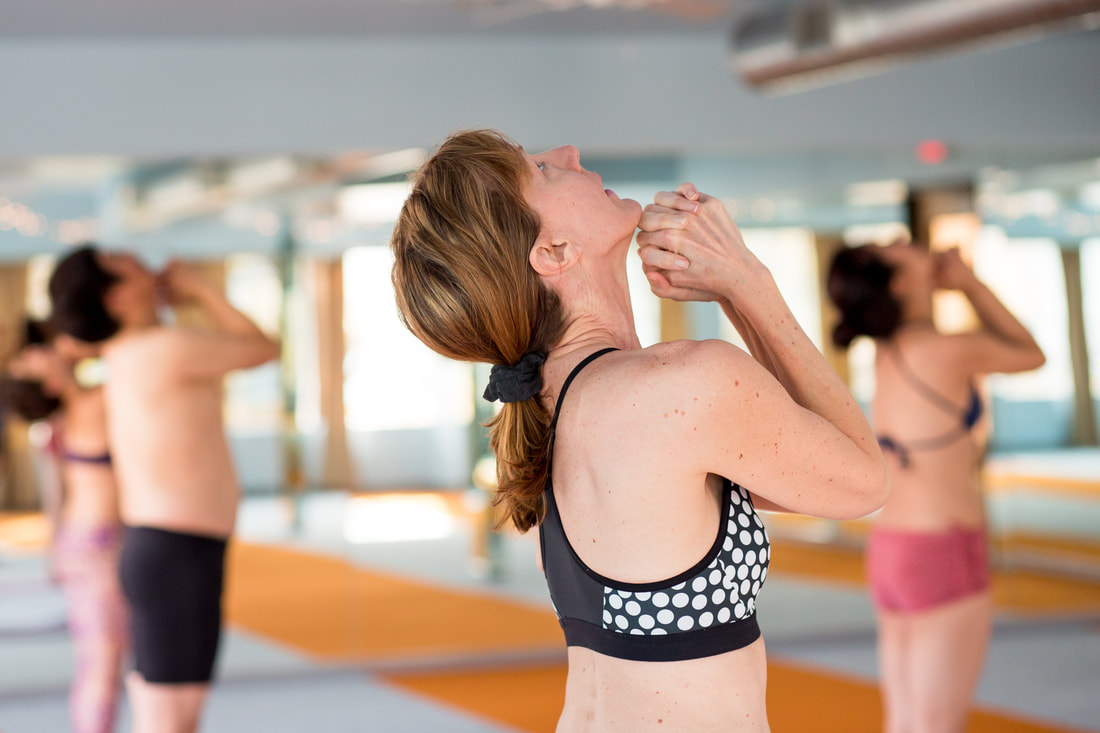 I often think of this dude I knew who always waited until Pranayama was over before he would go in to class: he said it hurt his neck and shoulders. He'd find all kinds of ways to stall: go to the restroom, check his phone, fill his water (again) or change clothes verrrrry sloooooowly... By skipping this breathing exercise, however, he was missing a bigtime opportunity to warm and prepare for the rest of class precisely (yup!) his neck and shoulders. His hurting was likely due to improper technique, but by avoiding Pranayama he was robbing himself of the chance to ever learn the right way. Avoiding what challenges you is never the answer. If Pranayama feels uncomfortable, achy or awkward, chances are you stand to benefit from it greatly! If you do it correctly. Since none of us came out of the womb with our knuckles glued to our chins performing perfectly synchronized movements coordinated with 6-second inhales and 6-second exhales (ok, maybe Orlo did??) it takes practice and time to learn this technique. Offer yourself patience (which Pranayama will help with, too!) and never give up. Benefits of Pranayama breathing include:
Tips:
|
AuthorHHY Founder, Yoga Business Coach, yoga-doer and life-lover, Kay Afif! 
Categories
All
|
 RSS Feed