
|
So, you took your first Bikram Yoga class. You were proud of the achievement, but... later that day, you felt awful! Here's what you thought right away: maybe you should never do Bikram Yoga again. Maybe you just can't take the heat.  Not so fast.The thing is: after one class, you can not really know whether the heat- or anything about what you did in yoga- was the cause of how you felt later. Think of it this way: no scientist would ever perform an experiment one time and say they have conclusive evidence to support a claim! It could be that you had a virus, or you ate something that didn't sit well. It could be that you were not as well-hydrated as you thought. (Most of us don't drink enough water throughout the day.) Or maybe how you deal with stress in your life has been affecting your body in some way you were not aware of- until you put your body in the heat. We can feel ill for so many reasons! So, if Bikram Yoga doesn't make you sick, why am I even writing this blog post?Unless you have a very specific medical condition like being allergic to your own sweat, Bikram Yoga is most likely not going to make you sick. (And it may just help you solve a whole slurry of medical problems.) But the heat will make you uncomfortable. Which makes it an easy scapegoat for all kinds of sensations. I'm writing this blog post because: I get it. Those first few classes can leave you feeling a whole mess of feelings, and not all of those feelings are always pleasant. But nothing you do which is transformative will be pleasant all the time. The body is wired to seek comfort, and the mind is wired to seek bliss. The hot environment of Bikram Yoga is meant to be stressful on your body. By putting your body under stress, you create change in your body. (Note: stressful does not mean dangerous. 105 degrees is not a dangerous temperature for a person to be in for 90 minutes.) Doing yoga in a hot room is like looking in a mirror through a magnifying glass: your experience in the hot room shows you (in BIG size) what you have been doing- or not doing- to care for yourself throughout the previous hours, days, weeks or even years. For example: if you are a smoker, you may have trouble with breathing in class. Guess what? That does not mean Bikram Yoga is bad for breathing. Bikram Yoga is just showing you the effects of you being a smoker. (For this reason, many of our regulars credit Bikram Yoga with helping them quit smoking.) After your first class, I'll bet you'd never done anything like it before! (You might have even exclaimed exactly that to your teacher or a friend: "I've never done anything like that before!") Like anything new, you have to give your body time to adjust.It is perfectly normal to have a headache or feel tired after your first or even first few classes, especially if you had been dehydrated when you came in! Did you know that if you felt thirsty during class, it probably means you were already dehydrated? Feeling depleted can be due to irregular breathing or holding your breath, which can definitely be a thing among first-time Bikram yogis. (When we concentrate on learning a new routine, a common tendency is to hold our breath while we focus hard on what we're doing.) Involuntary breath-holding puts strain on the muscles and nervous system. The good news is, by practicing awareness of breath and conscious breathing exercises (as we do in Bikram Yoga) you can regain control of your breathing and normalize your breathing patterns. And because we do the same sequence of poses every time, you will quickly learn how to pace yourself during the class. While the yoga never gets "easy," you will get better at handling it. Tension headaches or migraines can be triggered or made worse by dehydration. If you experienced one of these following your first class, it is likely that poor hydration is to blame. You're not used to sweating this much! Not yet, anyway. To handle headaches or migraines, up your water intake throughout the day by several cups, even on days you are not practicing. To handle feeling tired, rest and breathe. These are good rules for life, and great rules for your next class too. By the way, did you rest during your class?Maybe you didn't know it was ok to take breaks. (It is.) Now you know! I'll bet that if you take more breaks during your second class, you will feel a million times better afterward. But it's SO hot...Our yoga room is heated to 105 degrees, a temperature which many humans in the world live in for weeks or months at a time. There is nothing "unnatural" or "extreme" about this temperature for the human body. The difference, people who live in hot climates are acclimated, and we in Portland are not. But your body has not evolved so incredibly much since your ancestors who used to tough it out through all kinds of weather with no air conditioning! While it may take a bit of practice, you can definitely handle 90 minutes in heat equivalent to a summer's day. And if you think you can't, you should definitely try. How else will you find out how truly badass you are? When you first begin doing Bikram Yoga, it does take time to acclimate to the heat. This is why we recommend practicing often as possible when you first start. At least 3 times your first week is the best, but do more if you can. The more often you come at the beginning, the quicker you will acclimate. Clothing matters.Another factor in feeling awful after yoga could be the clothes you wore to class. Check out this video we made about which clothes are just plain wrong for Bikram Yoga. If you felt so, SO hot in your sweatpants, try wearing shorts next time. Trapping your body heat in layers of baggy clothes is just a totally bad idea in 105 degrees. You wouldn't wear a bikini out snowshoeing, would you? Students often tell me when I say this, "oh, I know I will feel cooler- but I don't like to see my [thighs/ cankles/ gut) in the mirror.") I get it. I was that girl in a sports bra, tank top, tee shirt AND a long-sleeved shirt in class. I thought I was fat and ugly, and I thought I could hide. Over time I learned I was wrong about all those things. It turns out I was not fat, I was not ugly- and I could not hide under the bright lights of Bikram Yoga class. Little by little, I shed my layers. I began to feel cooler and better. More importantly, I began to love and appreciate the body I saw in the mirror. Self-loathing is not a good excuse for making your body suffer.What I want to leave you with is this: give this life-saving yoga system an honest try. Try to do 10 classes in 1 month. (The studiowide yoga challenge starts on Monday!!)
Or if that even seems like too far in advance to plan, just make up your mind to do 3 classes this week. If after that you totally hate it and don't see any reason to continue? Don't continue. At least you really gave it a shot. Use the tips from this post: hydrate, dress in small close-fiting clothing, and make sure you are breathing calmly through your nose throughout the class. I bet you will feel so much better, and I bet you will start loving your life more too. Let us know if you do!
0 Comments
I started practicing at BYSJ in fall of 2016 because I felt like my body and I were at odds. I needed a practice that allowed me to reconnect with myself. Since December 2015, I've been pregnant 4 times. The first three pregnancies have all ended with miscarriages. I was grieving the loss of those babies in unhealthy ways and I sought out yoga as a way to find my way back to peace. Since practicing, I appreciate my body in a different way.Like I mentioned, when I began practicing I felt at odds with myself. I was really self conscious and critical of my physical appearance, being overly critical of every lump and bump. There's something a bit magical that happens when you stare at yourself for 90 minutes. Over the course of practicing I began to marvel at all the ways my body could move and how it carried me through the poses. Even when it was hard, I learned that I could do hard things. This belief has carried over into my life. I am proud of my consistency in practice. The yoga is hard, but I continue to come back because of the benefits. The best thing I receive from my practice is peace. My husband, Filip, has noticed a big change in my temperament. I used to have big, dramatic reactions to small things. I was filled with anger and would lose my temper quickly. I've always had a difficult time managing anger. Since practicing Bikram's I am much calmer, my reactions are less immediate and intense, and I am overall happier/ more optimistic. My mantra in the room is just breathe. It's the only thing I tell myself I have to do. When it feels challenging to get to a class I just say, "show up and breathe." It makes it feel so manageable. The effects of the yoga practice: Physically, my posture has improved dramatically. I used to have a bit of a hunch, which I don't have anymore.I have always suffered from pain in my right shoulder. This practice has really opened/loosened those muscles that were always so tight. Eagle pose works wonders. But really, I practice for the mental benefits. It's the most important thing I do that keeps my mind peaceful; reduces my anxiety. I used to have crazy anxiety, I would need medication at times to manage it. Since practicing Bikram's I haven't needed any anxiety medicine.I practiced through my miscarriages. I would set up my mat in the back of the room and cry through most of the class. I was able to grieve my losses and let go of the pain through the yoga. It helped me get to a place where I could accept that perhaps motherhood was not going to be a part of my journey. Like I said, I could do hard things. When I found out I was pregnant for the fourth time, I didn't want to live in the fear. I also didn't want to live in the hope. I just wanted to live in every moment. Fear represented the past. Hope represented the future. I really didn't want to place any of my energy in either of those places. I thought a lot about the impermanence of a situation. The only experience I wanted was the one I was currently in. When I practice the yoga, the only thing I can think about is the current moment. Breathing through the pose, living through the pose. That's what I wanted for this pregnancy.I am very forgiving with myself when I practice the prenatal series. I really listen to my own cues about how much I can do and what I need in the moment to take care of myself and baby.
Moving forward, postpartum, I want to continue to treat myself this way. Dandayamana bibhaktapada paschimottanasana! This posture is not only the most fun posture to say the name in Sanskrit, but also a phenomenal stretch for your hamstrings, hips and spine. Because of the upside-down position, this pose provides increased circulation to the brain, nasal cavities and adrenal glands. It decompresses the spine, relieving pressure on the intervertebral discs and the spinal nerves (including the sciatic nerve) as well as having a pretty incredible effect on your cardiovascular system (see below...) Check out our video about how adjusting the size of your step can help you get the most out of this one: Have you heard of a baroreflex? "Baro" comes from the Greek baros, meaning pressure or weight. So the baroreflex is one of your body's mechanisms which helps maintain blood pressure at nearly constant levels. When you hang upside down in Standing Separate Leg Stretching, baroreceptors in your arteries sense that blood pressure to the head is elevated, and this starts a rapid feedback loop which causes the heart rate to lower and blood pressure to decrease to a more normal level.
Lower heart rate and lower blood pressure is associated with a calming sensation in the body, amirite? Which, if you think about it, means the placement of this pose in our series is simply genius! I mean, you just completed Balancing Stick pose, which got your heart beating out of your chest. And you're just about to do Triangle pose... But first, you get to do Standing Separate Leg Stretching, to bring your blood pressure and heart rate down, so by the time you hit Triangle you're operating on a much more even keel. Wow! What if you have sciatica? In this pose, a special consideration for those with active sciatica is that the feet should not be "slightly pigeon-toed." They should be parallel to one another, or even a little turned out. This takes pressure off the sciatic nerve during the pose. Last December, I bumped into Natalie (who I later found out is a longtime Karma Yogi at BYSJ) at a Garcia Birthday Band show. She stuck a buddy pass in my hand and told me I should go to yoga. It was a wild night and Natalie seemed like a cool lady, so I decided to check it out. I had no idea what I was getting into! At 65 I had never been to a yoga class. Now I do Bikram yoga every day... In 7 months of daily practice, here is what Bikram yoga has done for me: 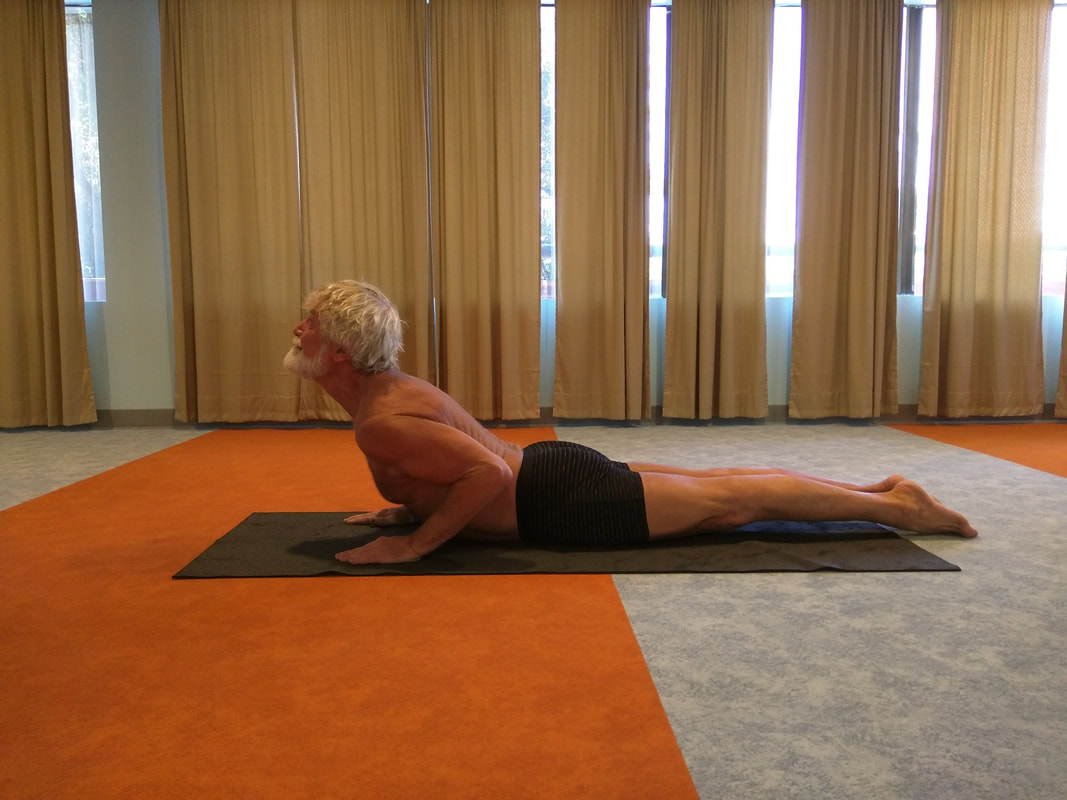
I wanted to share my story especially for other people with fibromyalgia who think there is no answer besides expensive medications with tons of terrible side effects. For me, Bikram yoga gives me relief of my symptoms without all of that other stuff, and it makes my life better in so many other ways too. You've got to give it a try! 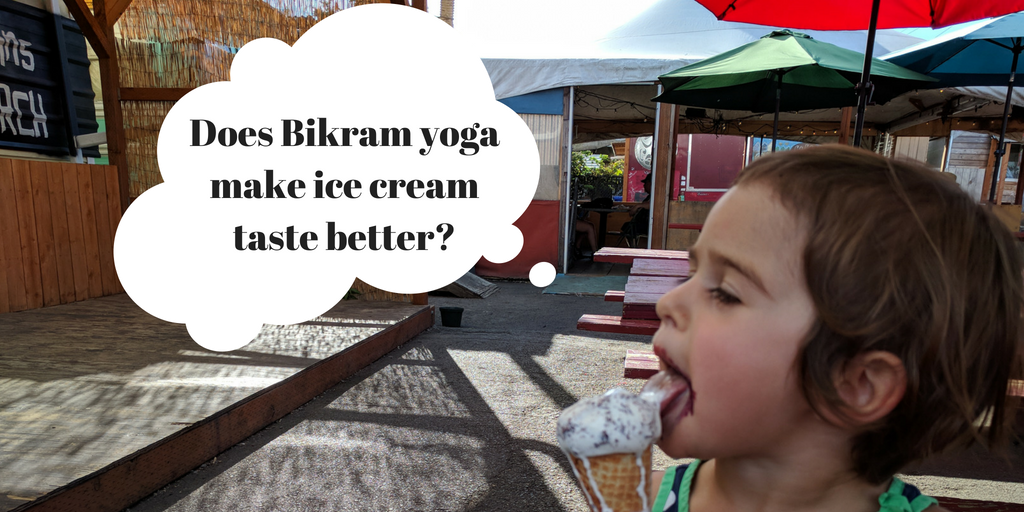 With temperatures in the 90s this week, summer is definitely here! Are you wondering whether it makes sense to turn the heat up even more by coming to hot yoga class? You may be asking yourself if you even have the energy for it. Your friends and fam may be looking at you funny if you mention where you're headed when the thermometer outside is reaching the triple digits... So is it worth it? Short answer= YES. Here are just a few reasons it is:
Exercise scientists have been researching the benefits you may already be experiencing! Here's a study that explores how “Exercising in the Heat May Improve Athletic Performance in Cool and Hot Conditions.” 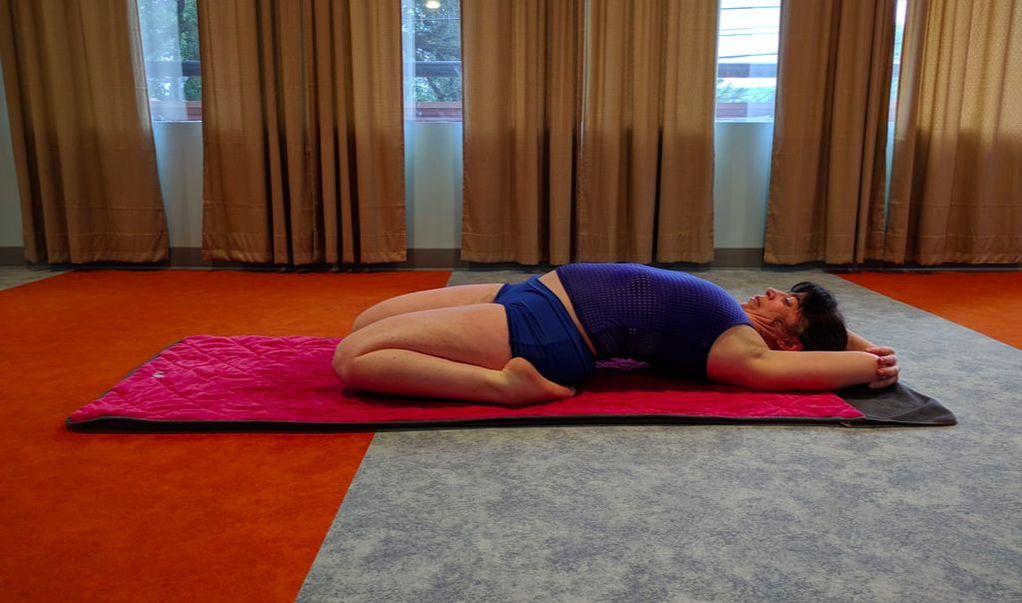 Before I moved to Portland in June 2016, a friend in Albuquerque introduced me to hot yoga. It wasn’t Bikram yoga and I didn’t understand the postures, but I was determined to keep trying. When I got to Portland, I was pleased to find Bikram Yoga St. Johns in my neighborhood and, although I knew nothing about Bikram yoga, I bought a year membership.
I didn’t get my money’s worth that year. I didn’t attend class regularly, rarely drank enough water, and every pose was "awkward pose." Classes were hard because I would lose my balance and even fall sometimes. I would leave bewildered, embarrassed and dehydrated. But something kept me coming back, and I always felt welcomed with open arms no matter how long I had been away. This New Year's Eve, I came to the studio for a late night yoga class. I rang in the New Year with Kay, Orlo and the rest of the Bikram St. Johns family, under the blacklight with kombucha. I decided to do the 30-day challenge shortly after that. I came up with a yoga schedule that fit around my work schedule, and I set a goal to do 20 classes in 30 days. I loved seeing the stars by my name accumulate. I did 18 classes in 30 days and I began to see first-hand the benefits of regular Bikram practice: my balance and eye- hand coordination improved, my chronic back pain and stiffness lessened, and my mood improved. I've been practicing about 10-12 times a month ever since. I am a Registered Nurse and my job is demanding physically, mentally and emotionally. I also have scoliosis and a leg length difference. I could barely move my shoulder at one point. With regular practice I can now move my shoulder without pain. I didn’t think that was going to be possible. I didn’t think a lot of things were possible when first started my Bikram practice. I didn’t think I would ever get into Fixed Firm pose (check out my photo above!) or stand on one leg. Now Fixed Firm pose is a favorite of mine and I’m getting closer to Standing Head to Knee every day. I have conquered many challenges in my life and Bikram yoga is a very worthwhile challenge. And I’ve learned a lot about myself in the process. Once all major joints of the body have been warmed up by practicing Pranayama breathing and the first few postures, you are ready for Eagle pose, garudasana! This pose opens up the joints of the ankles, knees, hips, shoulders, elbows and wrists. By twisting your limbs "like ropes" Eagle pose creates compression of blood and lymph flow headed to spots like your legs, kidneys and the lymph nodes in your armpits. Hold the posture very still while breathing calmly, so that when you release it your elevated heart rate will send a boost of high-speed circulation to those areas. Notice a white mark on your thigh after you come out of Eagle? That's a good indicator that you’ve been maintaining a strong compression. What's that you say? Your arms won't twist like ropes? Here's a quick video on what to do for this (very common) "issue"... Now that we've cleared up what to do with those pesky arms, here are a couple key aspects of Eagle pose and more tips to help you get the most out of your efforts:
Using leverage to promote good alignment and open joints. When you move your knees to the right and upper body to the left to get your feet, knees, elbows and hands in one line, you are using the leverage of one limb against to create the compression effect I mentioned above and open up your major joints. The key to not falling over while you make these adjustment is keeping your (especially lower) abdominal muscles tight and your upper body lifted away from your thighs. It's a backbending pose! Many beginners tend to lean or even hunch their bodies forward while they're setting up their Eagle, in an effort to pull their elbows down. Don't let this happen to you! Keep your upper body (when you hear the cue "upper body" in class, think mainly lower ribs upward) leaning back throughout the posture, which means (although you'll end up looking straight ahead) your spine is actually in a backward bending position. This position strengthens back and core muscles, releases tension in your lumbar spine, and compresses the kidneys. Pro Tips:
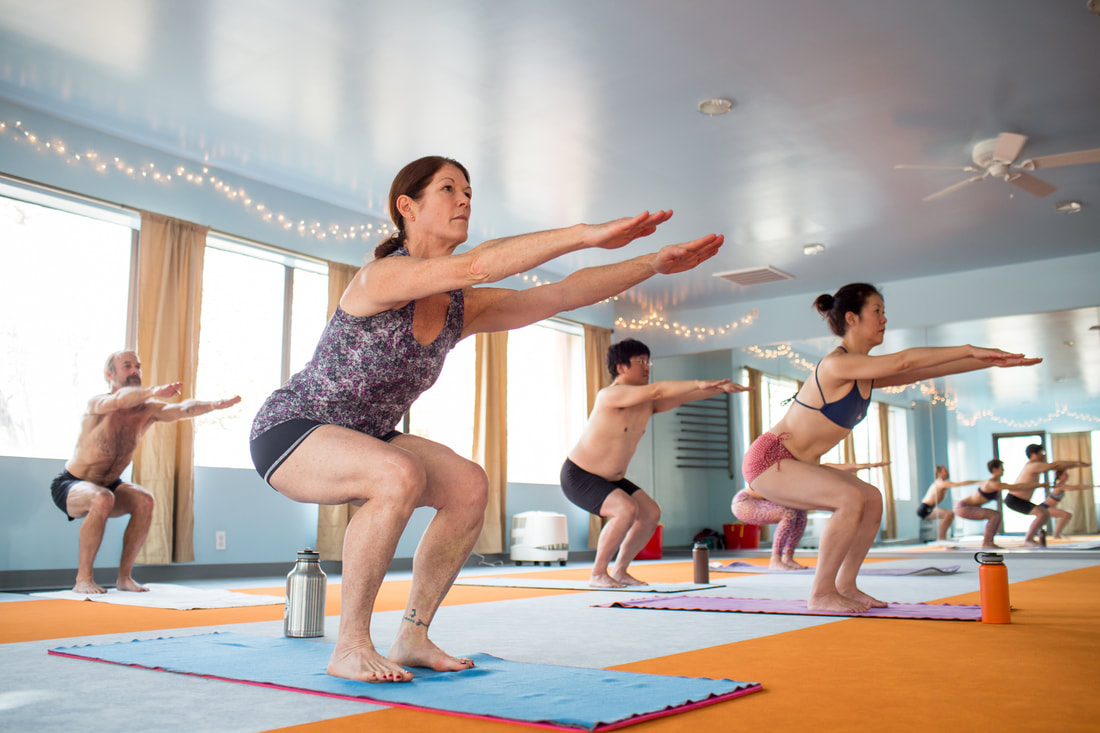 In the Bikram yoga system, we do the Awkward Pose in three parts. Here's a quick rundown of what to do in each one, how to do it, and why you should even care...
Even on its own, the first part of Awkward pose is an excellent all-around exercise, reminiscent of a squat you might have done at the gym (though Utkatasana has been keeping leg and butt muscles buff muuuuuch longer than the gym!) How to do Part 1: Step your right foot to the right about 6 inches, keeping your feet exactly parallel to one another so your heels stay invisible behind your toes. Keep in mind that in Bikram yoga "6 inches" varies from person to person! Basically, your heels should be directly underneath your hip joints. This alignment is important to make sure that when you sit down into the pose, pressure is distributed evenly in the hip, knee and ankle joints. Bring your arms up parallel to the floor with palms facing down and all 5 fingers together. Stretch your arms forward toward the mirror, exhale and suck your stomach in, then hold it in while you sit your hips back like you're sitting into a chair that's a bit too far behind you. Keep your spine straight to begin with and maximum body weight on your heels. It's normal if your upper body has to come forward a bit so you can sit your hips back. Once you're in the chair, lift your chest up and bend your total spine backward to bring your upper body back. (Tip: if you *can't* lift your chest up, you're probably sitting down too low- come up a little bit and try again.) Suck your stomach in and lean back into the heels even more, keep your chest up, lean back even more until you almost fall down backwards! Get psyched for Part 2: The second part of Awkward Pose is super challenging for a lot of people- so if your ankles are wobbling or your thighs are shaking, you are definitely not alone. The best tip for you is: don't skip it, and don't hold back from fear of falling or not being able to hold it the whole time. You have to start somewhere, and no one will laugh if you fall (most of us have been there!) Part 2 is great for increasing leg and foot strength as well as stretching out the feet, so give it all you've got and it will give you some nice-looking gams and great-feeling dogs in return! How to do Part 2: First stand up on your tippy toes and stretch your whole upper body up to the ceiling. Suck your stomach in and sit down as though you are sitting into a chair that's right underneath you. Be sure to sit down until your hips are in the chair, keeping your spine in a straight position. If you can only hold it that low for 2 seconds at first- be proud of your achievement! Little by little, you will build endurance- but only if you try the right way and you don't give up. How to do Part 3: By the 3rd part of Awkward pose, your legs are already well warmed up. Come up a little bit on your toes and bring your knees together, being sure to keep your heels behind your toes. Exhale breathing and sit down as slow as possible, keeping your knees together and your spine in a straight position. Sit down all the way onto your heels, then stretch your spine up towards the ceiling to make a half-inch gap between your hips and heels. Keep your knees together and forward, thighs parallel to the floor, arms parallel to the legs, spine straight so from the side you look like a 3-sided box. Here's the hard part: inhale breathing and slowly come up while keeping your spine straight. This requires you to really concentrate and connect with your lower abdominal muscles (to keep your hips from going back and upper body tipping forward) as well as tremendous thigh strength (and determination!) to keep your knees together. "But my knees!!" If you are suffering from knee pain, have a recent knee injury or have limited range of motion in your knees, here are a couple special tips for you in Awkward:
Why to get Awkward: All three parts of Utkatasana are excellent for improving blood circulation in the ankles, knees and hips. This pose strengthens the thighs, calves and hips muscles while improving flexibility of the hip, knee and ankle joints. Awkward helps relieve symptoms of rheumatism, arthritis and gout. It's also great for toning lower abdominal muscles, pelvic floor and the triceps muscles of the arms. Not to mention, it sure gets your heart rate up and is often the point in class where you'll really start sweating, making sure your limbs are nice and slippery for the next posture... 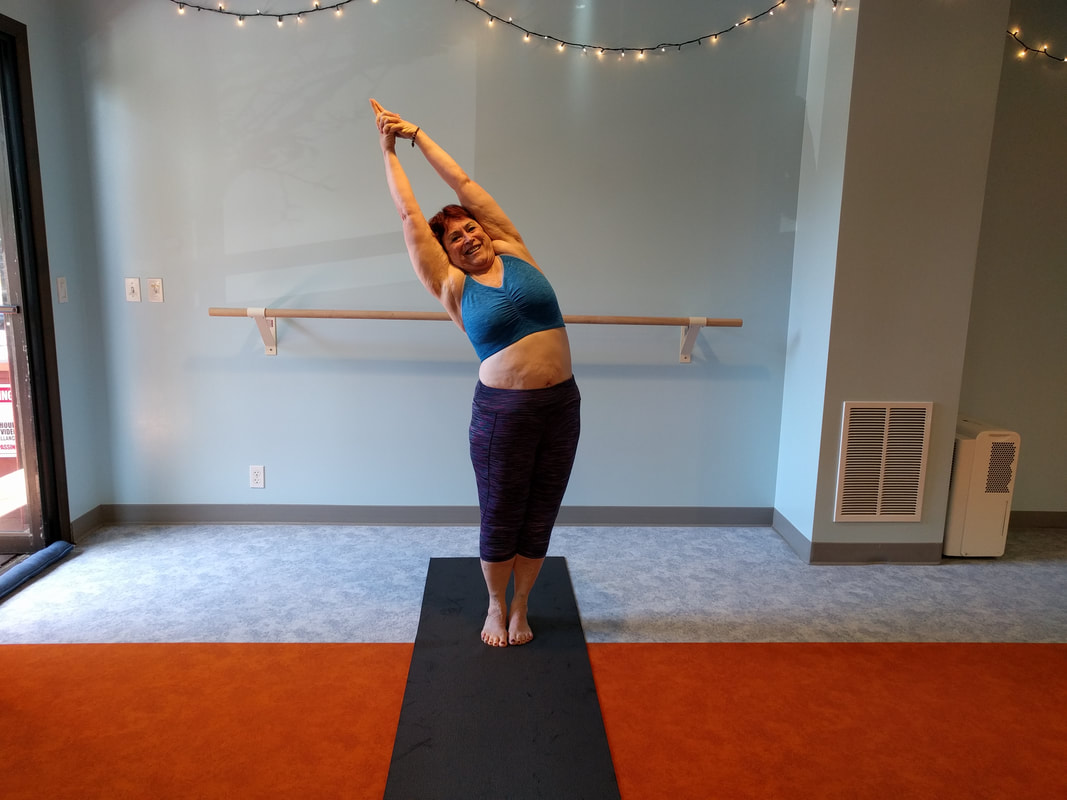 I will be 70 in January 2019, and I have had back issues most of my life. Last year I was in a lot of pain, almost to the point of not being able to walk. I would need to rest after walking only short distances with my little granddaughter. I was also feeling depressed a lot of the time.
My son and daughter-in-law encouraged me to try hot yoga, which I was sure was not for me. I tried it anyway, mostly so they would leave me alone! I have now been practicing Bikram yoga 2-3 times per week for about a year. My back pain is nearly gone and my range of motion is incredible. I had a serious balance issue and now, nearly a year later I'm getting my balance back. I know my good balance is going to be even more important as I get older for avoiding slips and falls. As I gain strength and balance, my mood and confidence have also improved. These days my energy level is very good, even though I was diagnosed with fibromyalgia years ago. I tell all my friends about yoga, and I’m trying to get the ones who could really use it to come to class with me! This little yoga community at Bikram Yoga St. Johns has brought me a new social life full of friendly and amazing people. I also have osteoarthritis, plantar fasciitis (which is no longer bothering me) and scoliosis. I have spinal stenosis, which used to cause leg and foot pain as well as lower back pain and balance problems. I thought the only alternative was to have surgery, but I certainly don't need that now. Bikram Yoga was the answer. I can feel my spine is so much better and stronger than before I started at BYSJ. I’m glad I stepped out of my comfort zone to try Bikram yoga, and I look forward to many years of practice ahead! As the first posture in the Bikram yoga class, the job of Half Moon pose (ardha chandrasana) is to get your spine feeling out its range of motion in a bunch of directions, right off the bat. By stretching up out of your waist, then slowly bending your upper body to the right while pushing your hips to the left beyond your perceived flexibility, you will create an incredible stretch down the side of your body. This side-bending action either stretches or tones every muscle in the torso, increases the lateral flexibility of the spine, opens up the hips and trims the waistline. Oh, what a feeling- and then you get to do it to the left! 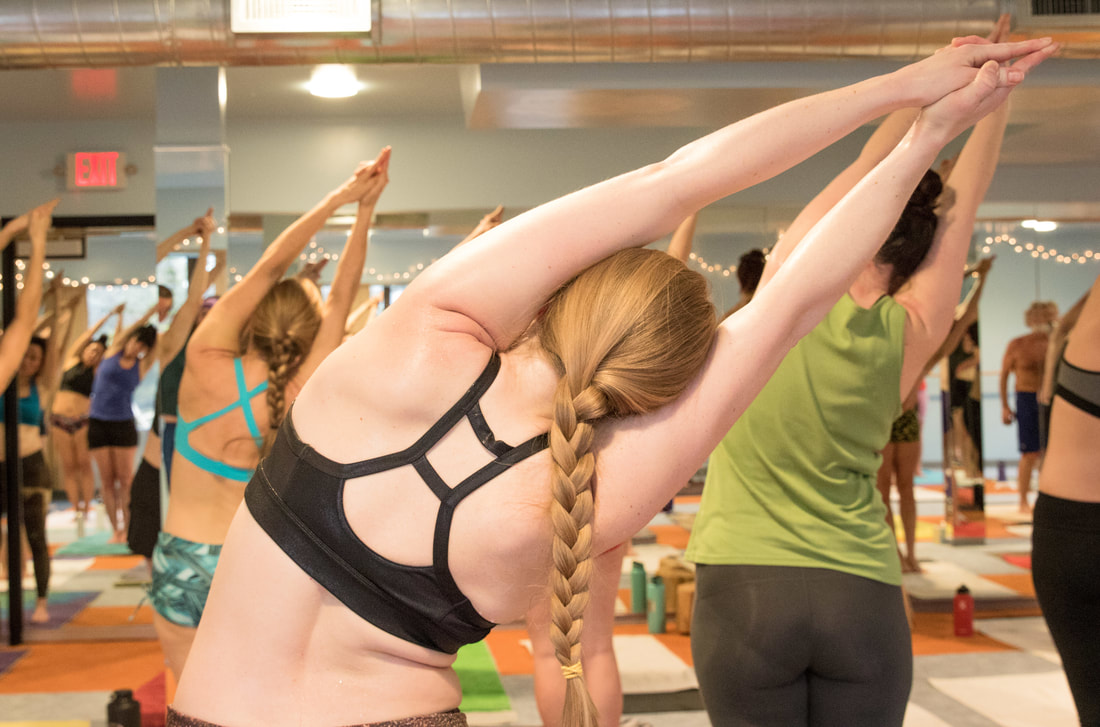 TIP: Half moon is the very first posture in the class, so there's no need to push it super hard, especially in the first set! Your body is not quite warmed up yet, so "take it easy, honey." Remember that the first set of every pose is diagnostic- it helps you figure out where your body is in the present moment. Second set is therapeutic- based on what you discovered in the first set, you decide whether to push a bit further, or back off a little more. Your breathing is an excellent indicator of which way to adjust- if you really can't keep your breathing normal (like you're watching TV) then you've done too much! Back off.) Once we have stretched to both sides, the third part of Half Moon is backward-bending. Your instructor will warn you, "Your back is going to hurt, don't be scared!" PSA: That doesn't mean that if a part of your body screams in sharp pain, that we think you should push through it! Not at all. This statement is simply a "heads up" that it's normal for the backbend to be uncomfortable- or even "hurt," in the sense of "ouch, I don't usually use those muscles!" Backbending can be a pretty uncomfortable position at first. It requires you to simultaneously use a lot of strength in your legs, hips and back while also relaxing the neck and stretching the arms and shoulders back as far as you can. The challenge (and any "hurt") is worth it though, because this first backbend is unbeatable at warming up the back muscles and de-stiffening (that's a technical term!) your spine for class, while opening the heart and chest. Be sure to keep your eyes open, so you don't get dizzy. At this point you have moved your spine straight up, side to side, and backward. Next comes Hands to Feet pose (padha hastasana.) This forward-folding posture continues to stretch the spine while beginning to work on stretching the sciatic nerve, muscles, tendons and ligaments of the legs. TIP: If you can't grab your heels from behind, bend your knees and try wrapping your elbows behind your calves. Then hold the backs of your ankles and start to straighten out the legs, keeping your grip by keeping pressure with the palms against the ankles. Eventually, you may be able to grab underneath your heels- for now just get as close as you can! 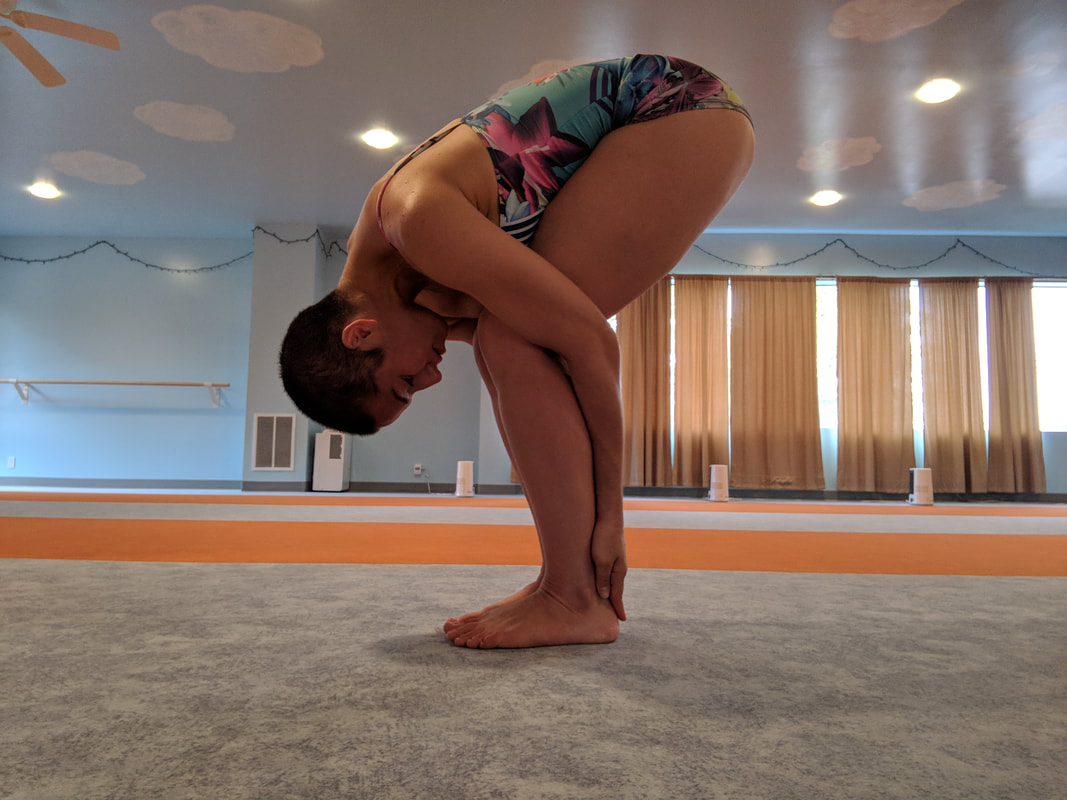 Besides the tremendous stretching, Padha hastasana also helps improve overall circulation to the legs, sends a nice rush of blood to the head, and strengthens biceps, lattisumus dorsi, quadriceps, hands and fingers. Always remember to keep your breath moving calmly, in and out of your nose- a smiling happy face can help. :)
|
AuthorHHY Founder, Yoga Business Coach, yoga-doer and life-lover, Kay Afif! 
Categories
All
|
 RSS Feed